Introduction
This article shows how to build up a personal website using hugo and deploy it to Github Page on MacOS.
What Hugo is
Hugo is one of the most popular open-source static site generators.
Hugo can generate beautiful websites using all kinds of Hugo themes easily. Therefore, the author can focus on content creation without caring too much about the website build and maintenance.
Create Website locally
Install Hugo
On MacOS we can install Hugo using Homebrew or MacPorts.
| |
You can verify your installation by checking the version of Hugo.
| |
Create a New Site Locally
| |
After running this command, Hugo will create a new folder named <your_site_name> under your work directory.
Add a Theme to Site
You can choose your own theme in Hugo Themes. After you chosen your theme, you can add it to your site in both ways.
- Download the theme and unzip it into the themes directory.
- Install with
git submodule:
| |
After installed the theme into your site, write theme = "<theme_name>" into the config.toml file under your work directory to implement this theme to your site.
You can now add a new post into your site with command:
| |
After save your changes, you can view this site locally by running:
| |
This command will builds and serves your site. And it will avoid writing the rendered and served content to disk, preferring store it in memory. The -D flag means include content marked as draft.
Now open http://localhost:1313/ in your browser, you should see your site with hugo theme implemented.
Create Remote Repo
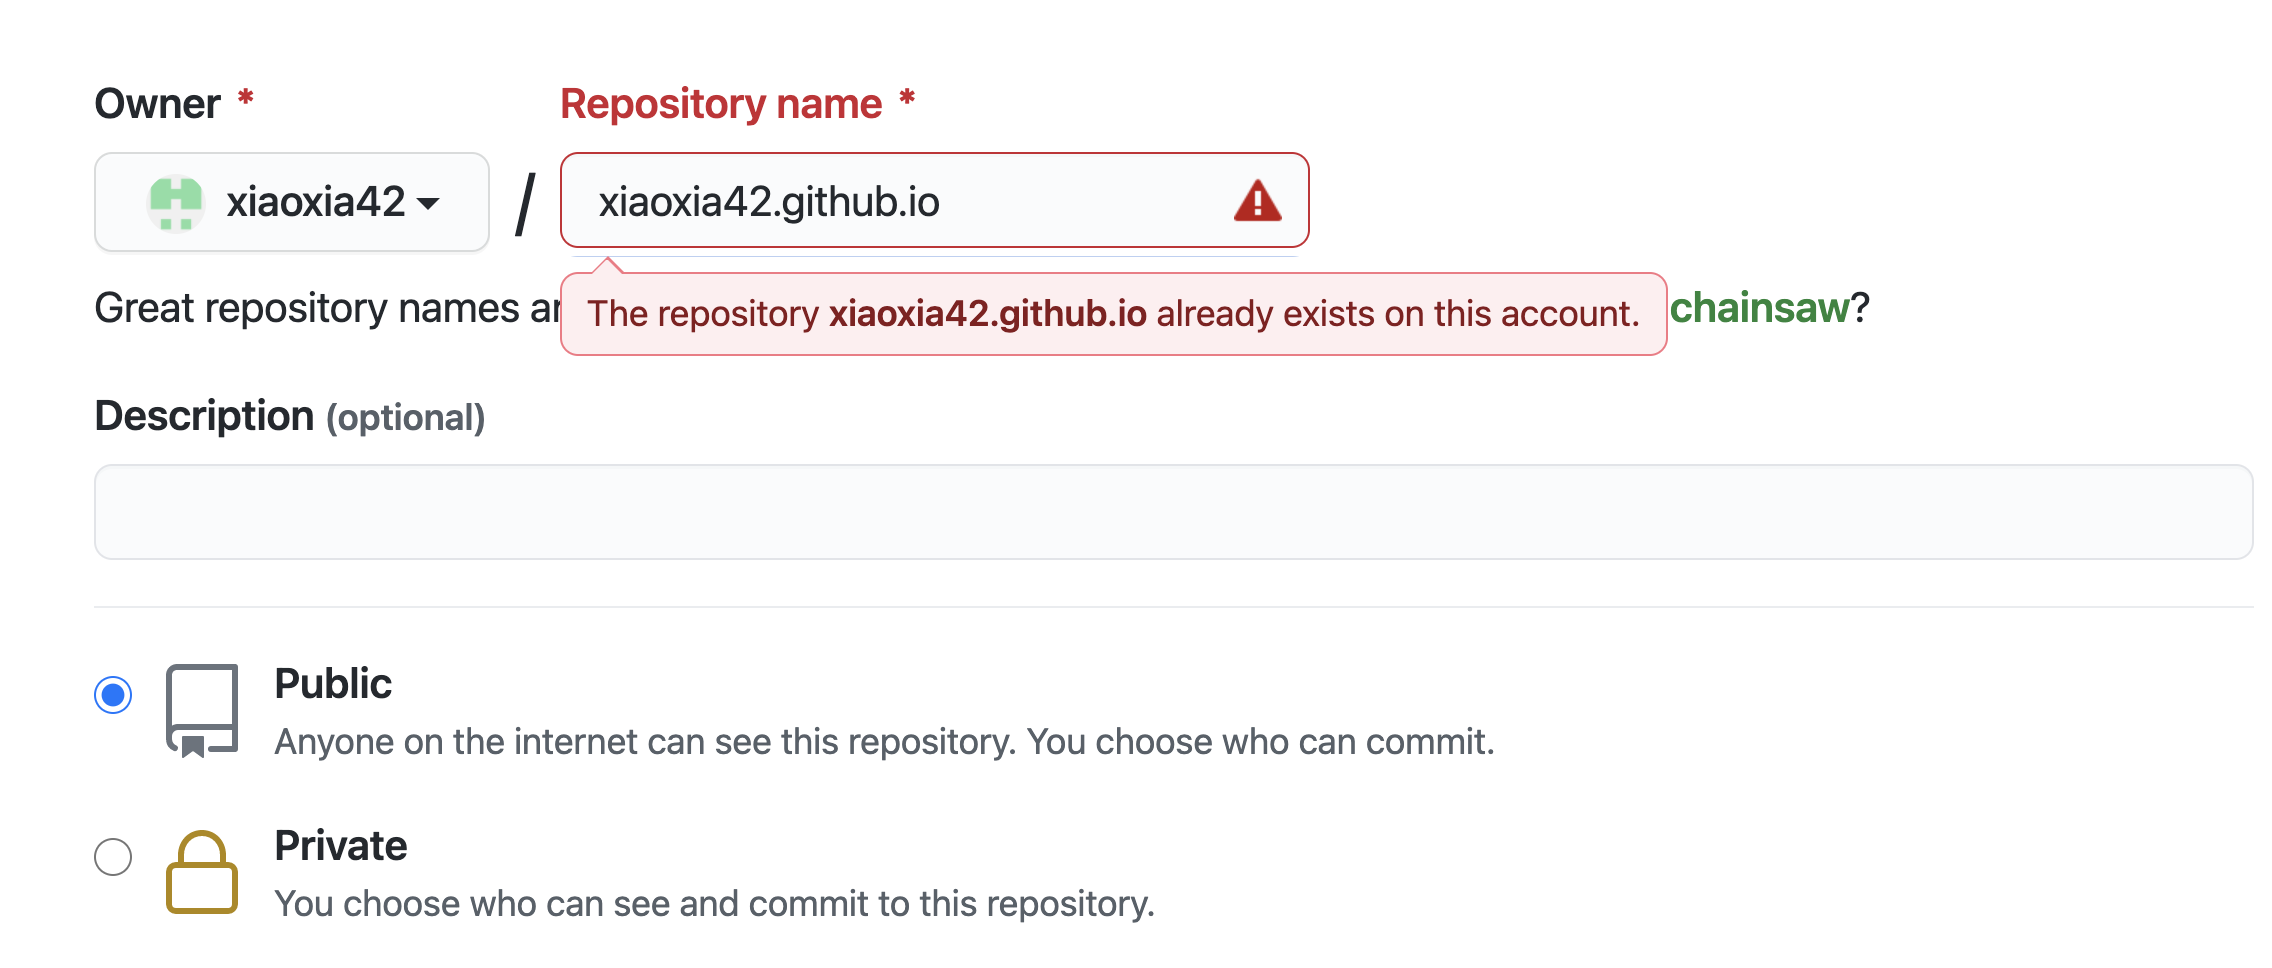
You have to create a public github repo to store those static file generated by Hugo if you want to use the github page to deploy your personal website.
This new created repo must named <username>.github.io, where <username> is your username of Github. Here because I have created a repo to store my site, a duplicate name error occurs.
Deploy Site
There are two ways to deploy your site to github pages.
Build Locally and Deploy
Add the public folder (place to put static pages generated by Hugo) as a submodule of your source code folder.
| |
And change the baseURL in config.toml into https://<username>.github.io/.
Then build the Hugo pages with command:
| |
Change your directory into ./public you will find those files generated by Hugo. Commit them and push the changes into the <username>.github.io repo.
| |
Deploy with Github Actions
In this way, we need to create a repo to store the source code of the website (This repo can be either public repo or private repo). And the source code repo will generate and deploy the static pages to <username>.github.io automatically. We can implement auto generation and deployment with the help of github workflow.
we can create a workflow in our source code repo by adding a .github/workflows/gh-pages.yml file to it. The content of this file refer to Hugo Setup is:
| |
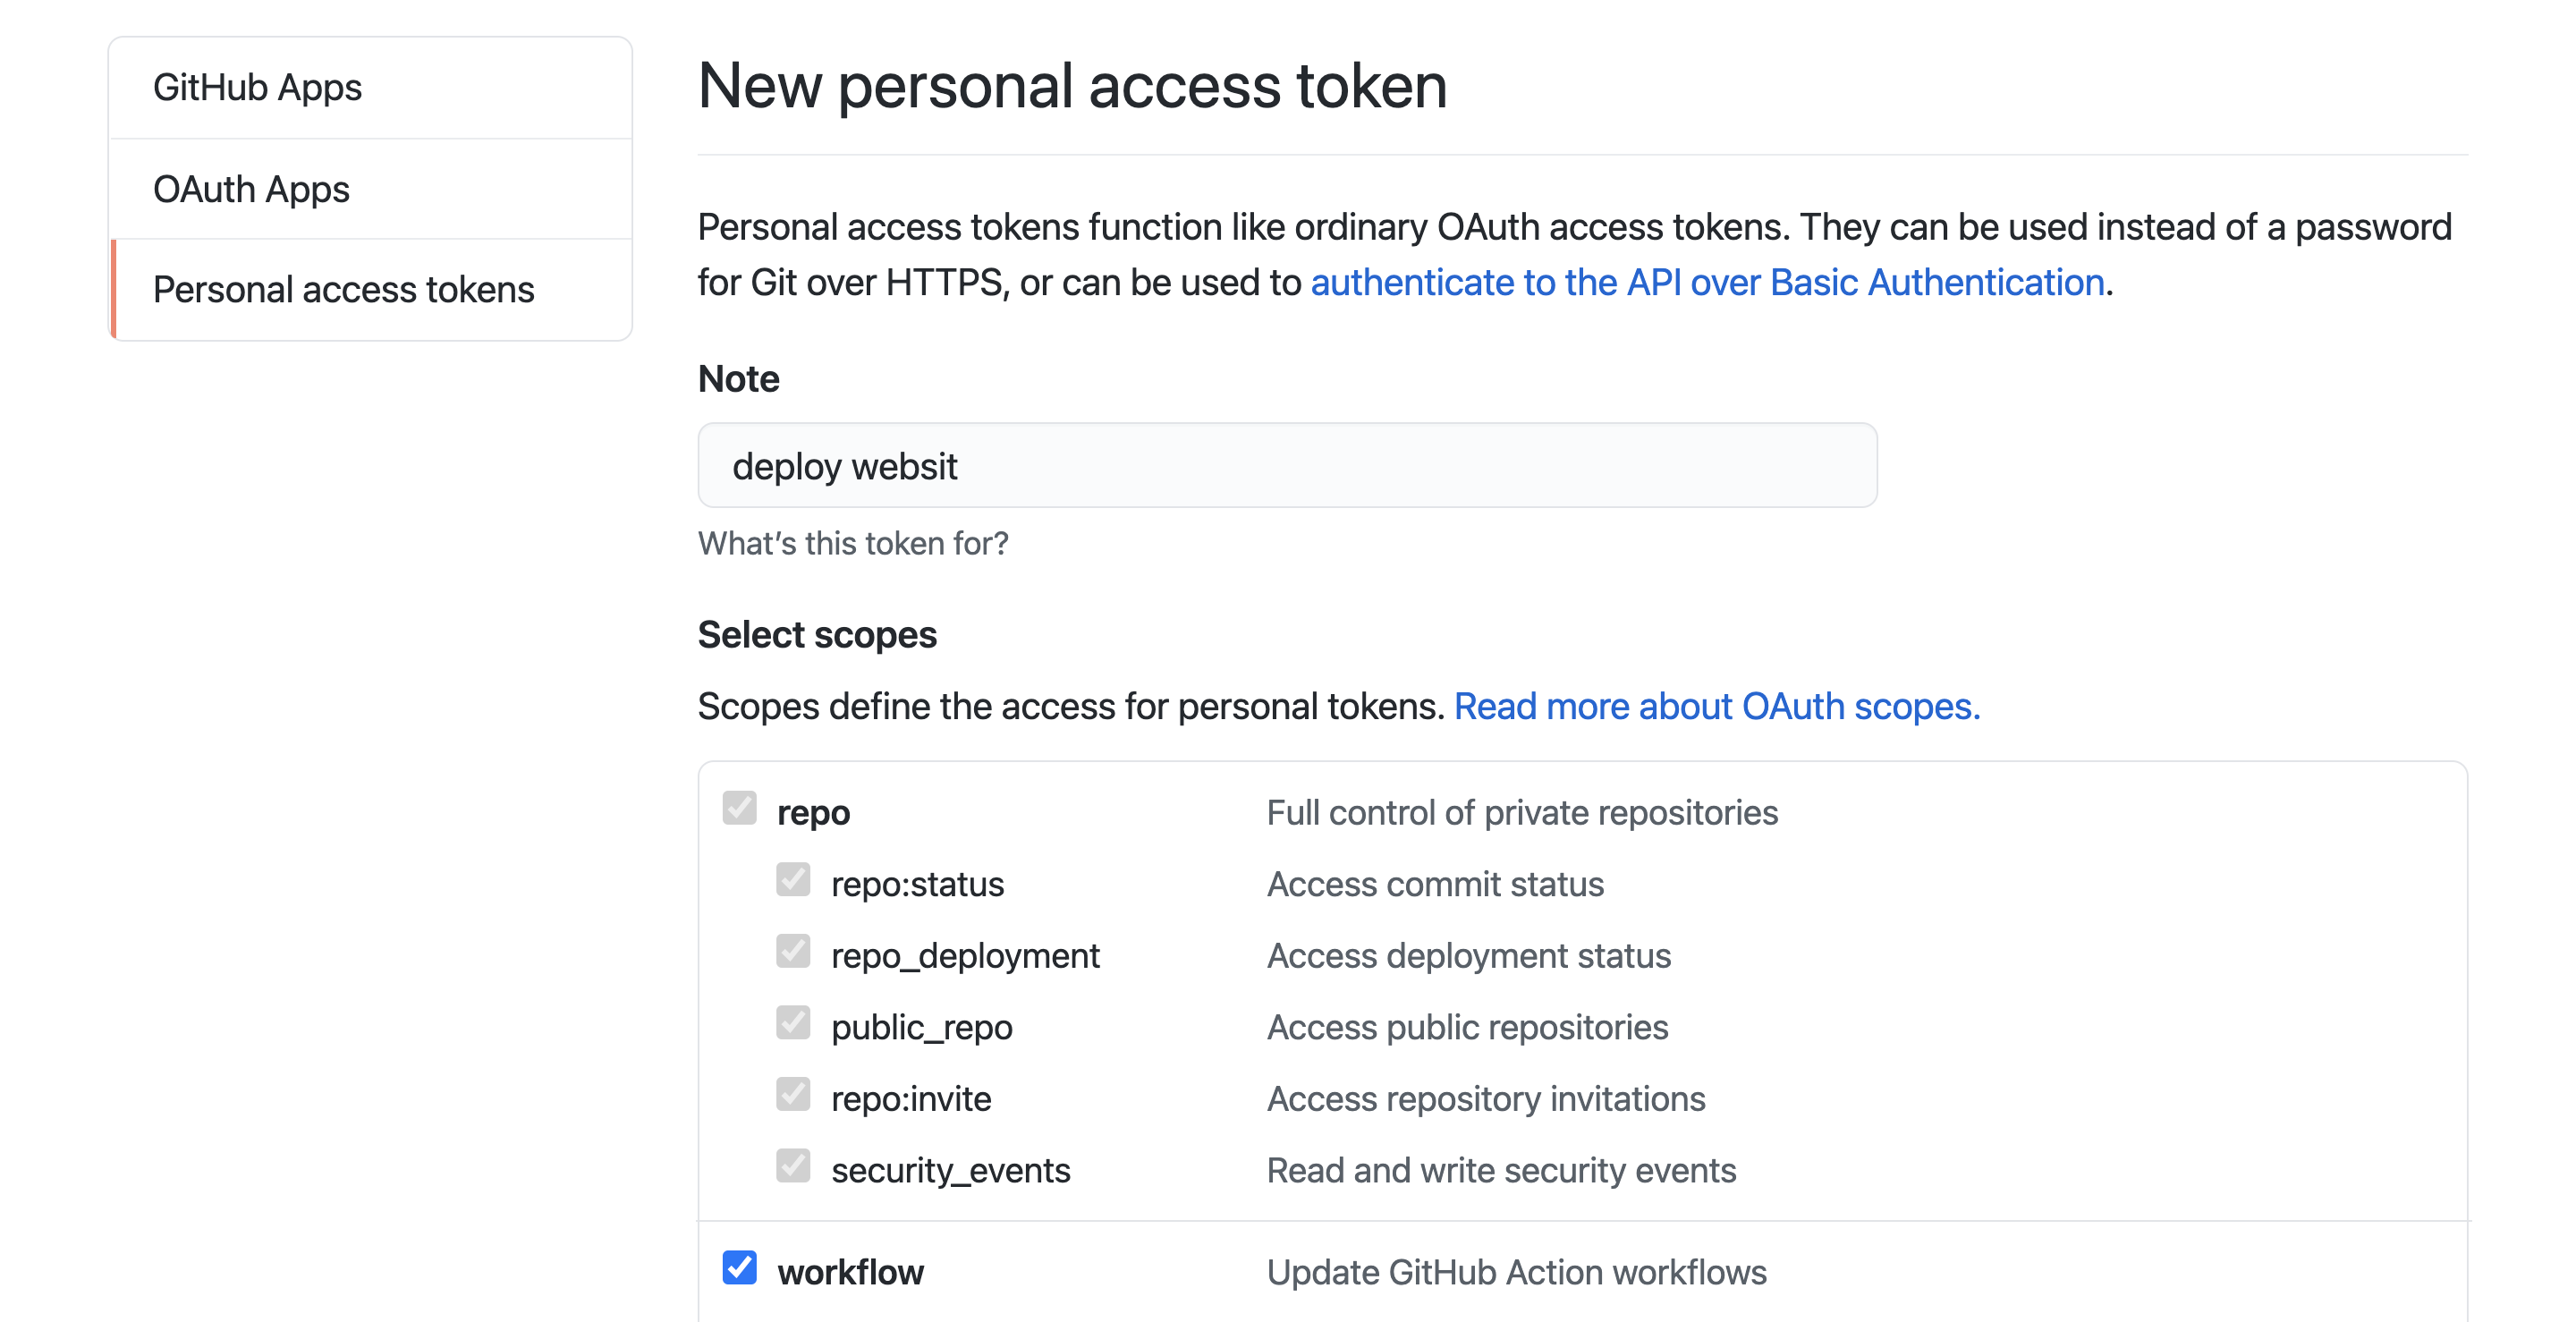
You can generate ACTION_ACCESS_TOKEN by clicking your avatar right-upper side. And in Settings->Developer settings->Personal access token you can generate a new token.
Generate a token with repo, workflow and admin:repo_hook selected, and save the token for next step.
 Now that you’ve got the access token, go to the source code repo to set up the
 secrets.ACTION_ACCESS_TOKEN.
Create a new repository secret inside the Settings->Secrets of your source code repo. Name it as ACTION_ACCESS_TOKEN and paste the token we get above here.
Now the github workflow will do the auto deployment for you once you push new commits to the source code repo.
Congratulate! You can see your website if you type <username>.github.io in your browser now 👏